Solution: Wah-rcade
Answer: CASCADINGSTYLESHEETS
Art: Jamie
Each pixel of each arcade image has a corresponding (R, G, B) tuple where each value represents the strength of the primary color at that pixel. Meanwhile, each of the 3 red, green, and blue cables carries data streams that encode the intensities of that primary color for every pixel in the original image.
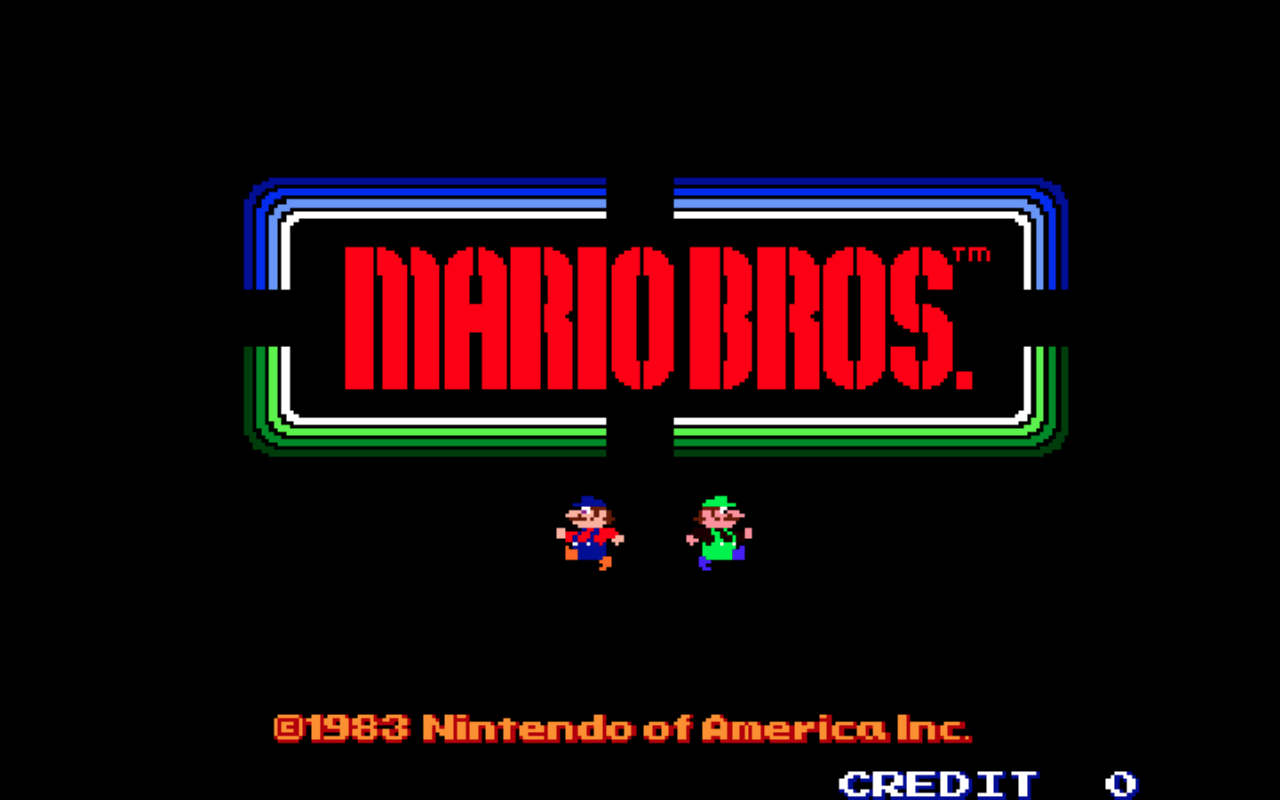
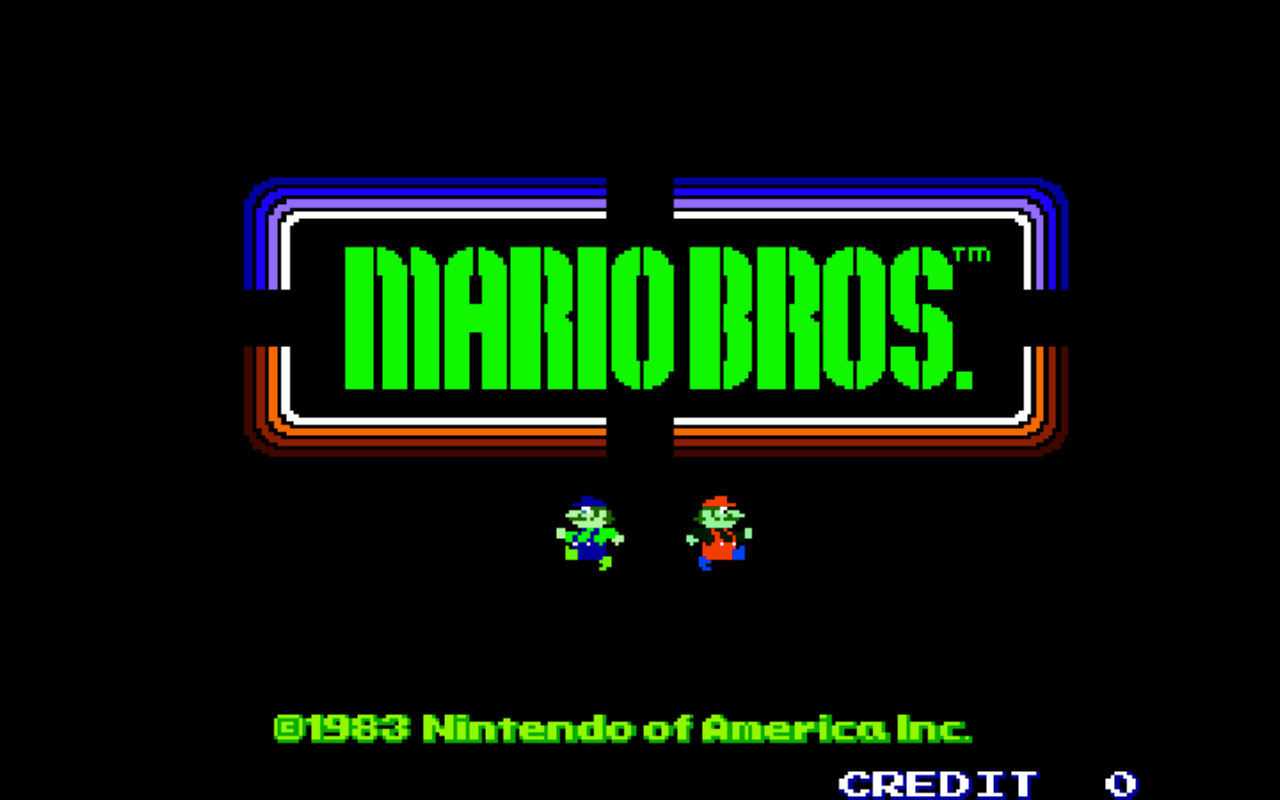
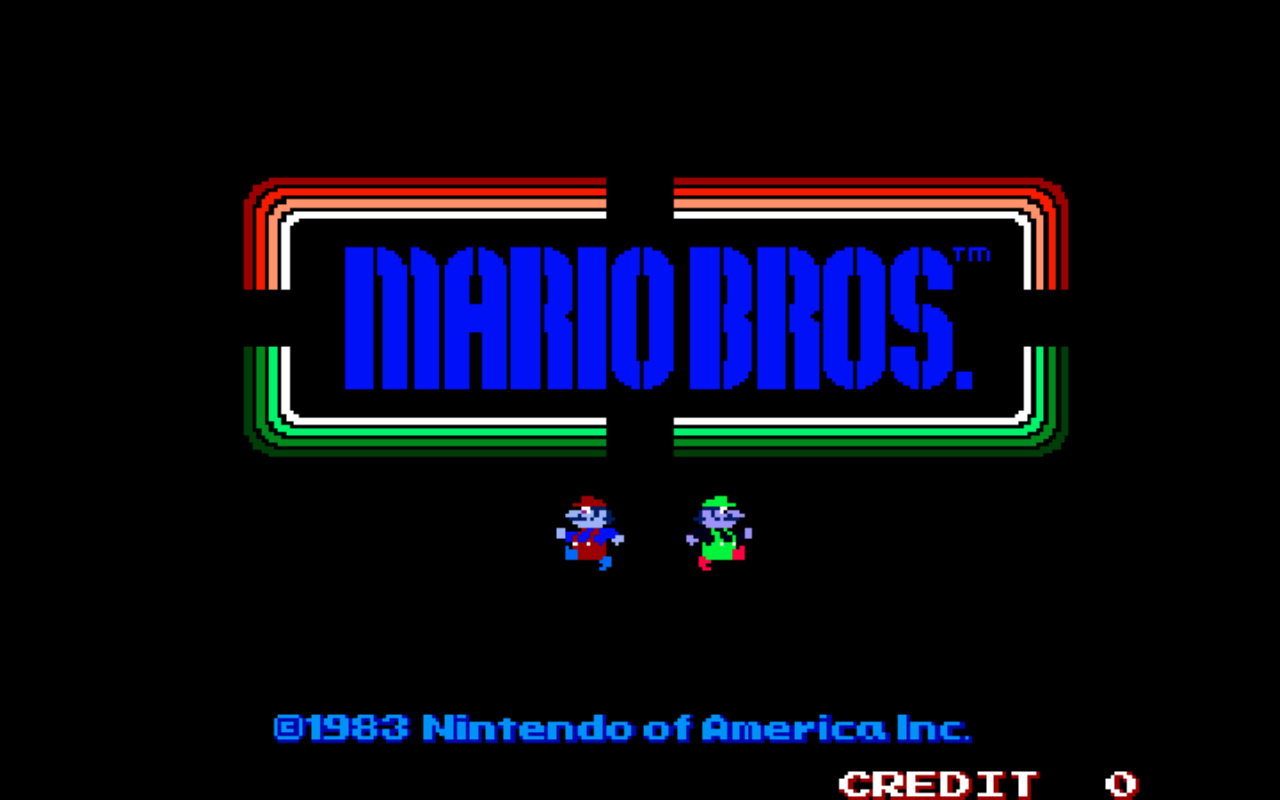
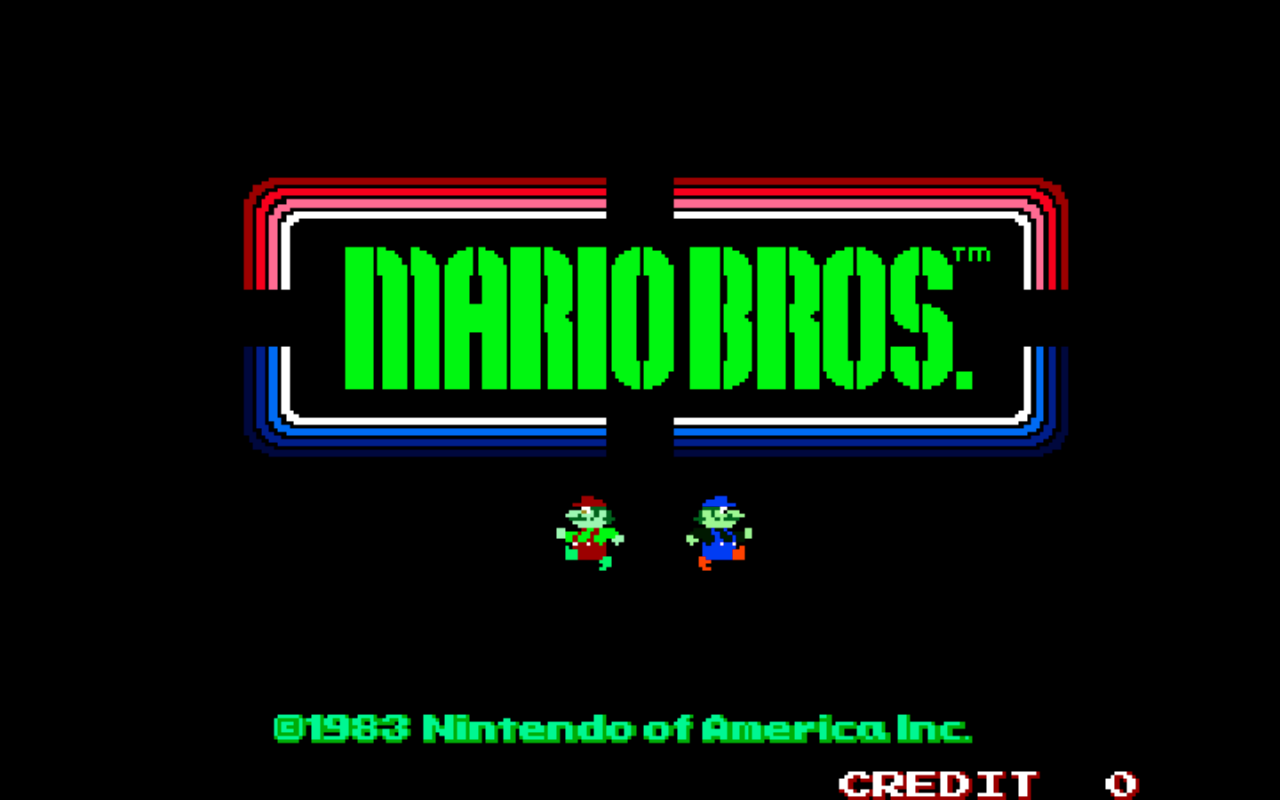
The world 1-3 arcade image (left) is the original, corresponding to row 3 of the cables fixed at red-green-blue, indicating that red, green, and blue data streams were correctly matched into their respective channels. However, by switching up which data streams go into which channel input, one can come up with similar images with different color patterns.
This puzzle is solved by figuring out which one of the red, green, or blue data streams was “plugged” into each channel to create the other 13 images.
Take the world 1-2 image for example:
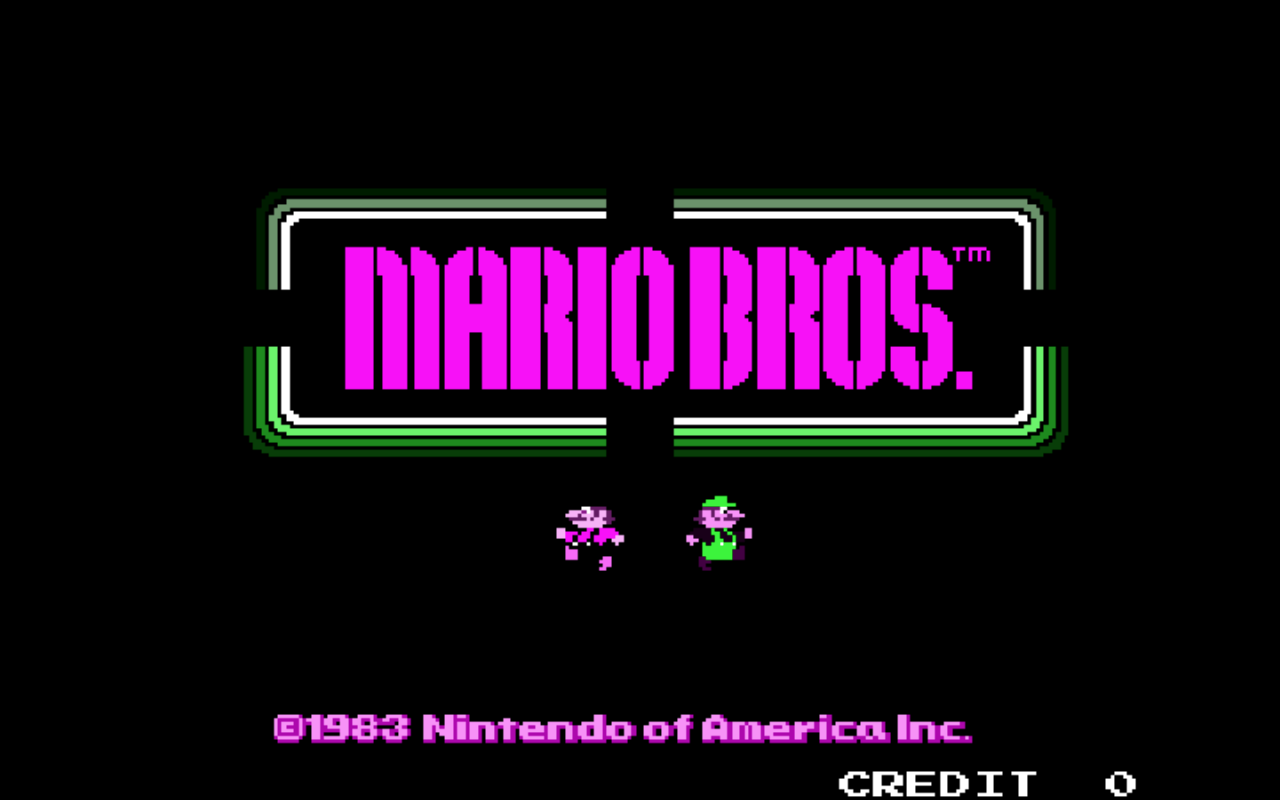 One can observe that all of the green parts of the original image have stayed green. From this, it can be deduced that the green channel (i.e. the 2nd input) must remain green. The other key observation is that the red parts of the original image have turned pink (a color that is equal parts red and blue). From this, it can be deduced that the red and blue channels (i.e. the 1st and 3rd inputs) must be red (as they must both be equal, and non-zero strength in the original image).
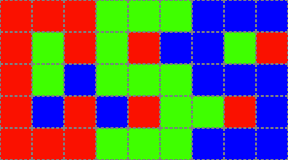
Repeating this for all the images and filling in the grid visually spells out the letters CSS, for the answer CASCADING STYLE SHEETS:
A code solution
One concern we had with this puzzle was its solveability for color-blind puzzlers. In the end, we decided to include a note in our FAQs that some puzzles would involve colors and added tooltips to components where recognizing the color was vital to the solve - in this case, the given cables. We hoped that this would make the ah-ha accessible to color-blind puzzlers, even though they would need image editing software or code for the final extraction.
After the hunt ended, we were delighted to hear that there were puzzlers who took this approach and solved the puzzle despite being colorblind. Thank you to David Glasser of More About Vikings for sharing their code solution!
giving the solution:
    World 1-1: RRR
    World 1-2: RGR
    World 1-3: RGB
    World 1-4: RBR
    World 1-5: RRR
    World 2-1: GGG
    World 2-2: GRB
    World 2-3: GGG
    World 2-4: BRG
    World 2-5: GGG
    World 3-1: BBB
    World 3-2: BGR
    World 3-3: BBB
    World 3-4: GRB
    World 3-5: BBB
CES
During the hunt, a pretty common mistake was to read CES instead of CSS:
CSS vs CES/CONSUMERELECTRONICSSHOW
One possible reason is from thinking World 2-2 and World 2-4 were the same. But a more likely reason is from believing that the cables carried colors instead of intensities. This wrong interpretation works for all of the colored in Worlds 2 and 3 except 2-4, because for those only two colors swap while one remains the same. For those three worlds, the color that the original red "MARIO BROS" text becomes is the same as the cable that went into the red socket under the correct interpretation, but this is not the case for World 2-4.
As a result, many teams believed 2-4 to be "GBR" instead of "BRG," giving the solution CES, which also felt thematic.
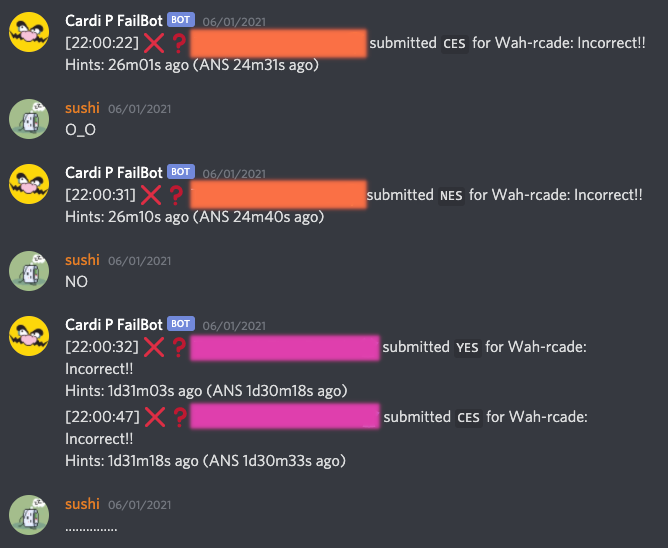
This interpretation of cables carrying colors is invalidated by the colored worlds in World 1 (since there cannot be a magenta wire that still gives the "C"), as well as the grayscale images. This ended up being an unexpectedly frequent incorrect answer and became somewhat of a running joke throughout the hunt:
Author’s Notes
One of my first and favorite online puzzling events was the Ultraviolet Puzzle Challenge, which had puzzles more visual and abstract than I had seen. So when it came time to writing my first puzzles, my mind drifted to creating something that followed in that style.
The original plan for the puzzle was grander, but I distilled it to this idea after realizing that the Round 2 puzzle answers would be difficult to portray visually and more complicated ideas would not be appropriate for Round 1. I hope that despite being a pretty straightforward idea with only one big ah-ha, this puzzle's simpleness and visual extraction would still be satisfying.
The first draft of this puzzle was only the 15 images, without World 1-1 and 1-3 cable configurations (or even the existence of cables) or the grid given. After five or six unsuccessful test solves, I was ready to throw in the towel and declare the idea a lost cause. Luckily, my test solvers had more faith than I did and gave me ideas for making the ah-ha more approachable. The end result ended up being less abstract and probably a bit too easy for puzzlers already familiar with the concept, but hopefully was still interesting to some folks.
Apologies to my poor test solvers, Anthony, Ryan, Alison, Akira, Dan, Max, and Cardinality Rejects who were subject to the earlier versions of this puzzle. Also apologies to everyone on the hints team who had to reply "please double check world 2-4" many many times. Lastly, a special shout out to Jamie for working with me to figure out the most aesthetic and cleanest display.